Hidden GEM -Easy Way to Import All the Certificates with out any Scripts
Hi All,
Up to now we are using the PowerShell scripts to export and import all the certificates during the migration from one server to other servers.
This time we will use one simple solution that is there in the MMC console .
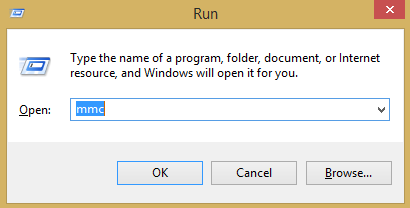
Open the MMC console from run
And select certificates

Go to any store that you want to import in another servers and select all the certificates and select export option.

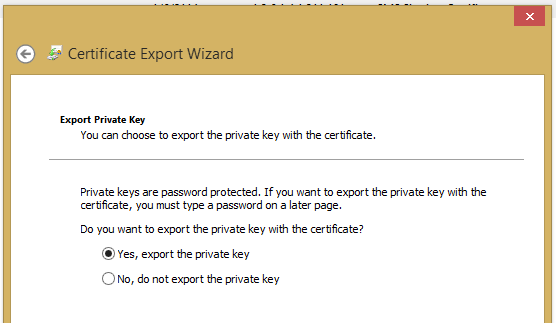
Select below properties

Put the password

Give the location to export the certificicate

You have exported the PFX file, and go to destination server and select the store you want to import and import the certificate. That’s it.
Regards,
Visit site: http://www.sqlblogging.com
Send an Email: sqlblogging
Easy Way to GAC Many DLLS at a time in a Server
Hi All,
We have a situation in which we need to GAC 100 missing DLLs in one of the server, so we gathered missing DLLs in one folder.
We have taken below steps to work on this hassle-free .
1. Put all the DLLs in one folder, suppose put it into D:\GAC in the server
2. Open the command prompt in administrator mode and go to above mentioned folder location and check all the DLLs with DIR command
3. Run the below command in the command prompt to get the complete file path information of the DLLs information into one text file
dir /s/b > E:\ assemblyList.txt
4. Copy this file into location where GACutil.exe is present. You can download gacutil tool from Bing. Or you can find in the below link
http://cid-5ae3f43b1d873a75.office.live.com/self.aspx/Public/gacutil.zip
5. Run the below command to GAC all the Dlls that are present in the File
gacutil /il assemblyList.txt
Regards,
Visit site: http://www.sqlblogging.com
Send an Email: sqlblogging
Exporting and Importing BizTalk Rules
Hi All,
When you are importing the business rules from old servers to new servers In BizTalk Migration, better you should export the rules from the MSI export option.
If you export the rules using the MSI export option, the rules will be binded to the application at that time, so that you can identify which policy belongs to which application.
Below is the screen shot of the rules that were deployed with rules export option from old server.

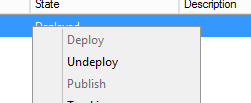
While importing the rules using the MSI in the BizTalk, you will see the policies are already there error, in that case you need to change the status of the policies from the deployed to Published.
This can be done by in the All Artifacts Policies section and select all the policies and right clickà un-deploy
Regards,
Visit site: http://www.sqlblogging.com
Send an Email: sqlblogging
How To Get Parties,RoleLinks and their associated Send ports
Hi All,
We have a requirement to compare all the Parties that are enlisted in the role links in 2013 servers to 2009 servers, so I quickly created one Sql query to get the latest Role Links and their associated parties and send ports information in the 2009 BizTalk servers, so that it will be compared with 2013 Server information
Query:
USE BizTalkMgmtDb
SELECT party.nvcname [PartyName],
role.nvcname [RoleLink],
assembly.nvcfullname [Assembly],
sendport.nvcname [SendPort]
FROM bts_sendport sendport
INNER JOIN bts_party_sendport partysendport
ON partysendport.nsendportid = sendport.nid
INNER JOIN bts_enlistedparty_operation_mapping operationmapping
ON operationmapping.npartysendportid = partysendport.nid
INNER JOIN bts_enlistedparty_port_mapping portmapping
ON portmapping.nid = operationmapping.nportmappingid
INNER JOIN bts_enlistedparty enlistedparty
ON portmapping.nenlistedpartyid = enlistedparty.nid
INNER JOIN bts_party party
ON enlistedparty.npartyid = party.nid
INNER JOIN bts_role role
ON role.nid = enlistedparty.nroleid
INNER JOIN bts_rolelink_type rolelinktype
ON rolelinktype.nid = role.nrolelinktypeid
INNER JOIN bts_assembly assembly
ON assembly.nid = rolelinktype.nassemblyid
GROUP BY party.nvcname,
assembly.nvcfullname,
role. nvcname,
sendport.nvcname
Result:

Get the above result from 2009 and 2013 environments and copy into excel sheets and compare with beyond compare tool, if the e role link migration in 2013 was completed. Else use the 2009 result while applying the parties in BizTalk 2013 role links
Regards,
Visit site: http://www.sqlblogging.com
Send an Email: sqlblogging
How to Get the Latest Policies from BizTalk Server
Hi All,
We have a requirement to compare all the business Policies fter migrating from 2009 to 2013 servers, so I quickly created one Sql query to get the latest rules in the 2009 BizTalk servers, so that it will be compared with 2013 latest rules.
Query:
USE BizTalkDTADb
USE BizTalkDTADb
SELECT drs.strName[PolicyName],cast(drs.nmajor as varchar(2))+’.’+cast(drs.nminor as varchar(2))’PolicyVersion’
FROM (SELECT ROW_NUMBER() OVER(PARTITION BY strName order by strName asc, nmajor desc,nminor desc) [Rownum],strName,
nmajor,nminor
FROM dta_RuleSets(nolock) where dtUnDeployTime IS NULL ) AS drs
WHERE drs.[Rownum] = 1
Result:

Regards,
Visit site: http://www.sqlblogging.com
Send an Email: sqlblogging
An error occurred while attempting to install the BizTalk application: A file load exception occurred while attempting to install the assembly into the Global Assembly Cache. This error may occur if the assembly is delay signed, or if assembly was renamed
Hi All,
While doing the migration, we need to deploy and install the MSI from old server to new server, while Installing the MSI after we successfully imported into BizTalk Administration console, we are getting the below error.
An error occurred while attempting to install the BizTalk application: A file load exception occurred while attempting to install the assembly into the Global Assembly Cache. This error may occur if the assembly is delay signed, or if assembly was renamed after creating/signing. The given assembly name or codebase was invalid. (Exception from HRESULT: 0x80131047)
Solution that worked for me:
Go to each and every server and import the MSI Manually in to the administration console, don’t do the installation of MSI
When you are doing the MSI import, MSI will be imported in to BizTalk Mgmt DB and also it will be GACed.
Regards,
Visit site: http://www.sqlblogging.com
Send an Email: sqlblogging
Document for BizTalk Migration 2013
Hi All,
You can find the below Document if you are performing your BizTalk Migration to 2013 Version.
Regards,
Visit site: http://www.sqlblogging.com
Send an Email: sqlblogging
Unable to cast object of type ‘Microsoft.BizTalk.Streaming.VirtualStream’ to type ‘System.IO.MemoryStream’.
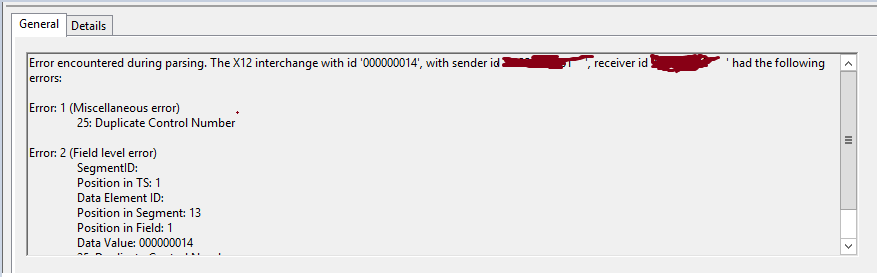
During our BizTalk migration, we have encountered below error in the BizTalk administration console
Reason: Unable to cast object of type ‘Microsoft.BizTalk.Streaming.VirtualStream’ to type ‘System.IO.MemoryStream’.
We thought it would be certificate error and we are checking partner certificate and our certificate.
But when we checked the event viewer, we are seeing the below error and interestingly we are not seeing this Error in our old server when the partner is sending the same file again and again
So we compared the EDI settings of same party in Old server with new server and we identified the issue
Duplicate check functionality is enabled in new server and it was disabled in old server for interchange settings
New Server Interchange Settings

Old Server Interchange Settings

So disabled the settings and issue got fixed.
Regards,
Visit site: http://www.sqlblogging.com
Send an Email: sqlblogging@outlook.com
Capturing Client Certificate Details using IIS Advanced Logging Module
Hi All,
We have faced this type of issues when we do partner connectivity tests. This post is one stop solution provider for all your client connectivity issues regarding logging.
We can install the IIS Advanced Logging Module from the below location
http://www.iis.net/downloads/microsoft/advanced-logging
After installing the module, you can view this module in the IIS server level and Site level and Virtual Directory Level.

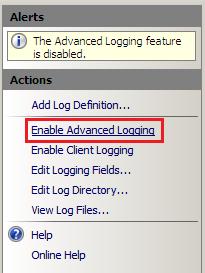
ENABLING AND DISABLING SERVER LOGGING
By default, IIS Advanced Logging is disabled after you install it. To enable the feature so that it can handle log messages from other web server components, open it at the server level in IIS Manager, and then in the Actions pane, click Enable Advanced Logging.
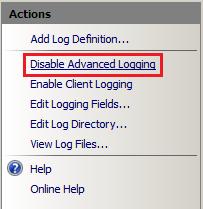
To disable the feature at a later time, open it at the server level in IIS Manager, and then in the Actions pane, click Disable Advanced Logging.
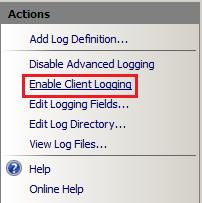
ENABLING AND DISABLING CLIENT LOGGING
By default, client logging in the Advanced Logging feature is disabled after you install it. To enable client logging in the Advanced Logging feature so that it can handle client log messages that are received as XML data via HTTP POST messages, open the Advanced Logging feature at the server level in IIS Manager, and then in the Actions pane, click Enable Client Logging.
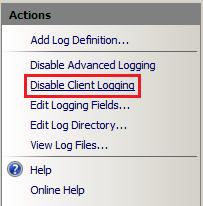
To disable client logging at a later time, open the Advanced Logging feature at the server level in IIS Manager, and then in the Actions pane, click Disable Client Logging.
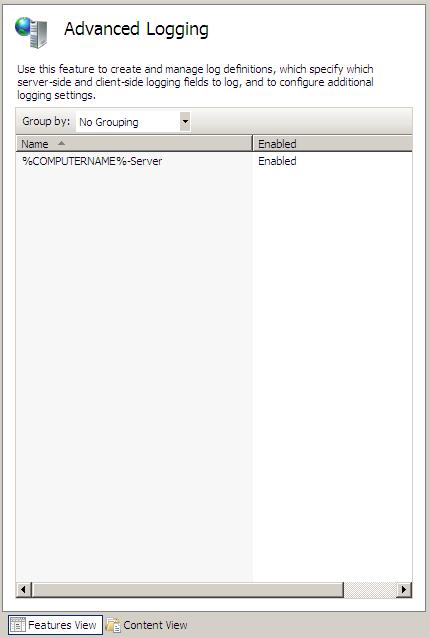
LOG DEFINITIONS
The Advanced Logging feature displays all of the log definitions that are available on the server on the server Home page in IIS Manager. The following figure displays the log definition %COMPUTERNAME%-Server, which is installed by default and captures some fields of interest from a content delivery perspective.
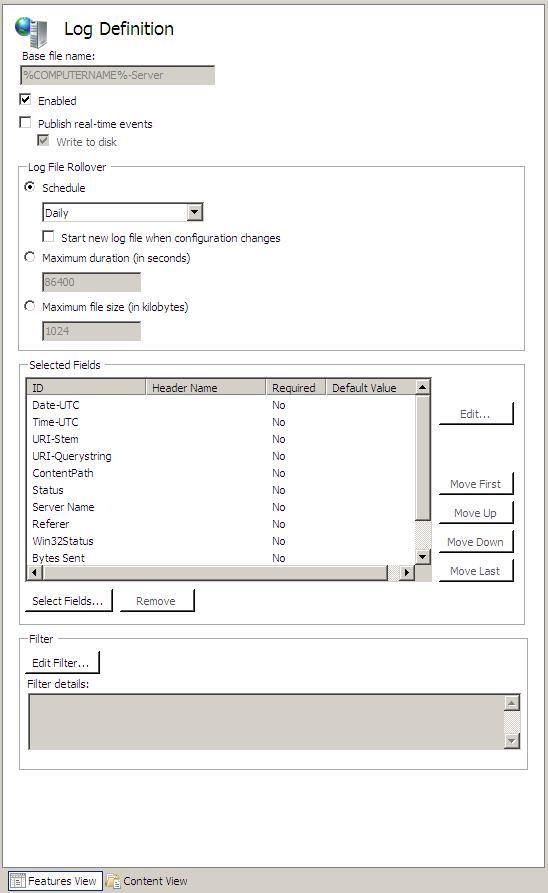
To view the the fields that are included in this log definition, click the log definition name, and then in the Actions pane, click Edit Log Definition. This opens the Log Definition feature page for the selected log definition, as shown in the following figure:
GLOBAL LOGGING FIELDS LIST
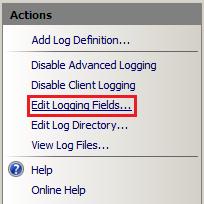
The global logging fields list contains all of the logging fields that can be added to log definitions. To view the global logging fields list, open the Advanced Logging feature at the server, website, directory, or application level in IIS Manager, and then in theActions pane, click Edit Logging Fields.
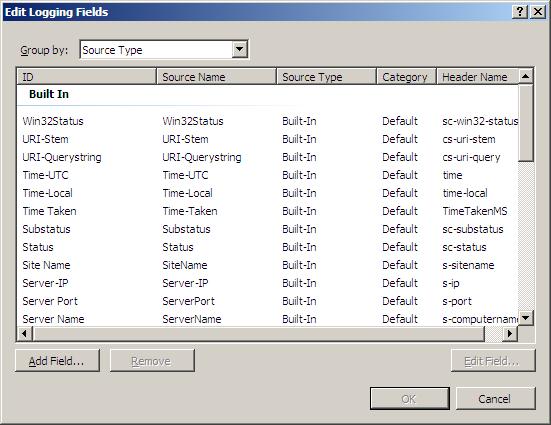
This action opens the Edit Logging Fields dialog box, which displays the logging fields that are included in the default installation of IIS Advanced Logging.
Custom Logging Fields
This section describes how to add a custom logging field to the global logging fields list. In the following examples, we’ll use a custom HTTP response header author as the custom logging field. This custom response header returns the webpage author’s name in the response to clients.
To add a custom logging field to the global logging fields list, do the following:
1. In IIS Manager, open the Advanced Logging feature at the server, website, virtual directory, or application level.
2. In the Actions pane, click Edit Logging Fields to open the Edit Logging Fields dialog box. The dialog box displays the logging fields that are available by default.
3. In the Edit Logging Fields dialog box, click the Add Field button.

4. In the Add Logging Field dialog box, specify settings and values for the custom logging field.
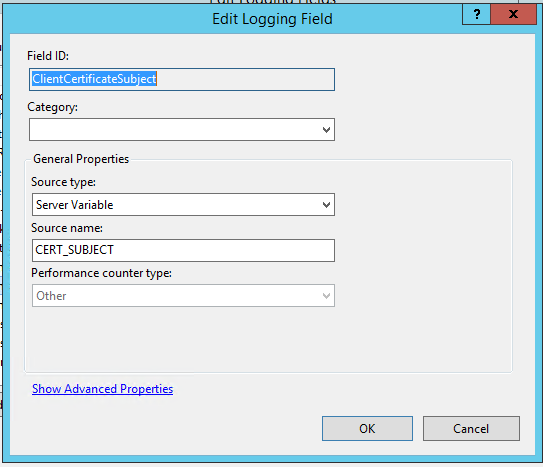
- Field ID. Type a friendly name (for example, ClientCertificateSubject) that will be included in the log definition and displayed in the global logging fields list.
· Source type. Select Server Variable
- Source Name. Enter CERT_SUBJECT as the HTTP response that you want to log.
Once the custom fields are created, then we need to create Log directory, it can be created at server level/website level/VD level
Procedure for Adding the Log Definition:
1. In IIS Manager, open the Advanced Logging feature at the server, website, virtual directory, or application level.
2. In the Actions pane, click Add Log Definition to open the Log Definition page.
3. In the Log Definition page, specify settings and values for the new log definition:
1. Base file name. File names of the logs files that are generated use a Base file name that you specify and a timestamp, in the form Basefilename_timestamp.log. You can use environmental variables as the base file name and the environment variables will be expanded by the Advanced Logging feature.
2. Enabled. The new log definition will be enabled when this check box is selected. You can disable it by clearing the check box. In this example, we leave it enabled.
4. Specify the order that the logging fields are written to the log file by selecting a logging field name in the list and then clicking one of the Move buttons to update its position in the list.

Storing Log Files
When you access a webpage hosted by the server, you should see Author being logged, along with the other logging fields that you selected in the previous section, in the log files that are created. By default, log files for the server and all websites are stored in %SystemDrive%inetpublogsAdvancedLogs.
You can change this “global” log directory for the server and for websites and you can also specify a unique log directory for each website on your server.
This section contains the following procedures:
• To specify a global log directory for the server and websites
• To specify a log directory for a website
To specify a global log directory for the server and websites
1. In IIS Manager, open the Advanced Logging feature at the server level.
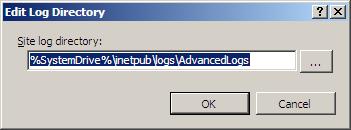
2. In the Actions pane, click Edit Log Directory.

3. In the Edit Log Directory dialog box, update the log directory path information.

• Server log directory. Specifies the log file directory for the server.
• Default site log directory. Specifies the default log file directory for all websites on the server. To change the log file directory for a specific website, see the following procedure.
To specify a log directory for a website
1. In IIS Manager, open the Advanced Logging feature at the website level for which you want to change the log file directory.
2. In the Actions pane, click Edit Log Directory.

3. In the Edit Log Directory dialog box, update the log directory path information for the website.
• Site log directory. Specifies the log file directory for the website.
Regards,
Visit site: http://www.sqlblogging.com
Send an Email: sqlblogging@outlook.com
BizTalk Msgbox Settings that should not be changed.
Hi Folks,
Below Is the official document where MS clearly given which setting you should not change in the BizTalk Msgbox database.
http://msdn.microsoft.com/en-us/library/gg634496.aspx
Regards,
Chaitanya
Visit site: http://www.sqlblogging.com
Send an Email: sqlblogging
Twitter: @chaitanya512
