Hi All,
We have faced this type of issues when we do partner connectivity tests. This post is one stop solution provider for all your client connectivity issues regarding logging.
We can install the IIS Advanced Logging Module from the below location
http://www.iis.net/downloads/microsoft/advanced-logging
After installing the module, you can view this module in the IIS server level and Site level and Virtual Directory Level.

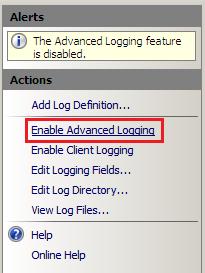
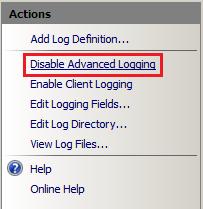
ENABLING AND DISABLING SERVER LOGGING
By default, IIS Advanced Logging is disabled after you install it. To enable the feature so that it can handle log messages from other web server components, open it at the server level in IIS Manager, and then in the Actions pane, click Enable Advanced Logging.
To disable the feature at a later time, open it at the server level in IIS Manager, and then in the Actions pane, click Disable Advanced Logging.
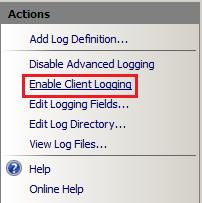
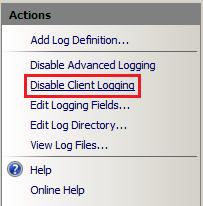
ENABLING AND DISABLING CLIENT LOGGING
By default, client logging in the Advanced Logging feature is disabled after you install it. To enable client logging in the Advanced Logging feature so that it can handle client log messages that are received as XML data via HTTP POST messages, open the Advanced Logging feature at the server level in IIS Manager, and then in the Actions pane, click Enable Client Logging.
To disable client logging at a later time, open the Advanced Logging feature at the server level in IIS Manager, and then in the Actions pane, click Disable Client Logging.
LOG DEFINITIONS
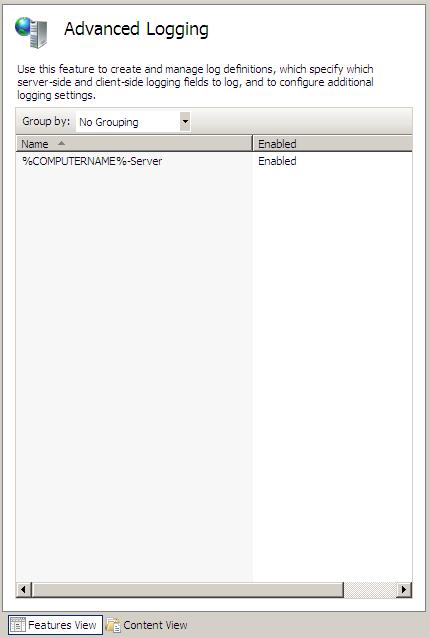
The Advanced Logging feature displays all of the log definitions that are available on the server on the server Home page in IIS Manager. The following figure displays the log definition %COMPUTERNAME%-Server, which is installed by default and captures some fields of interest from a content delivery perspective.
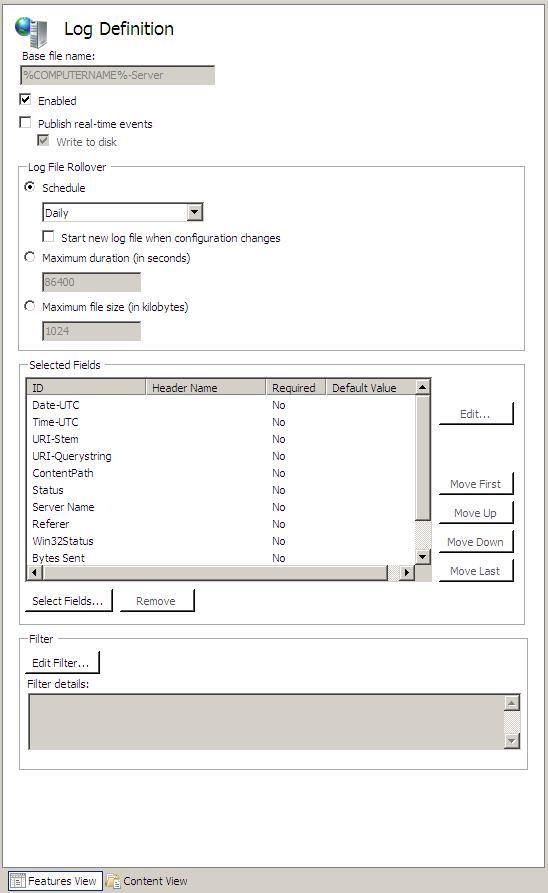
To view the the fields that are included in this log definition, click the log definition name, and then in the Actions pane, click Edit Log Definition. This opens the Log Definition feature page for the selected log definition, as shown in the following figure:
GLOBAL LOGGING FIELDS LIST
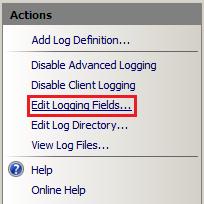
The global logging fields list contains all of the logging fields that can be added to log definitions. To view the global logging fields list, open the Advanced Logging feature at the server, website, directory, or application level in IIS Manager, and then in theActions pane, click Edit Logging Fields.
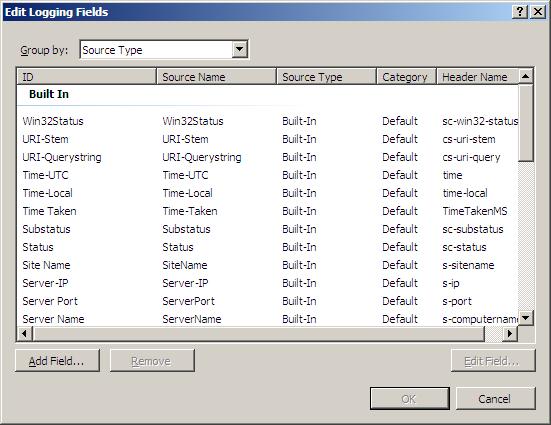
This action opens the Edit Logging Fields dialog box, which displays the logging fields that are included in the default installation of IIS Advanced Logging.
Custom Logging Fields
This section describes how to add a custom logging field to the global logging fields list. In the following examples, we’ll use a custom HTTP response header author as the custom logging field. This custom response header returns the webpage author’s name in the response to clients.
To add a custom logging field to the global logging fields list, do the following:
1. In IIS Manager, open the Advanced Logging feature at the server, website, virtual directory, or application level.
2. In the Actions pane, click Edit Logging Fields to open the Edit Logging Fields dialog box. The dialog box displays the logging fields that are available by default.
3. In the Edit Logging Fields dialog box, click the Add Field button.

4. In the Add Logging Field dialog box, specify settings and values for the custom logging field.
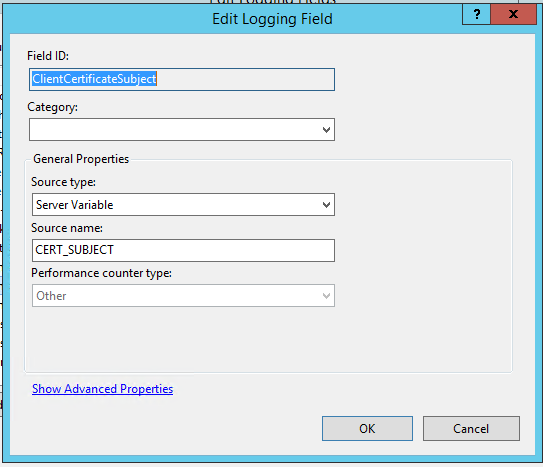
- Field ID. Type a friendly name (for example, ClientCertificateSubject) that will be included in the log definition and displayed in the global logging fields list.
· Source type. Select Server Variable
- Source Name. Enter CERT_SUBJECT as the HTTP response that you want to log.
Once the custom fields are created, then we need to create Log directory, it can be created at server level/website level/VD level
Procedure for Adding the Log Definition:
1. In IIS Manager, open the Advanced Logging feature at the server, website, virtual directory, or application level.
2. In the Actions pane, click Add Log Definition to open the Log Definition page.
3. In the Log Definition page, specify settings and values for the new log definition:
1. Base file name. File names of the logs files that are generated use a Base file name that you specify and a timestamp, in the form Basefilename_timestamp.log. You can use environmental variables as the base file name and the environment variables will be expanded by the Advanced Logging feature.
2. Enabled. The new log definition will be enabled when this check box is selected. You can disable it by clearing the check box. In this example, we leave it enabled.
4. Specify the order that the logging fields are written to the log file by selecting a logging field name in the list and then clicking one of the Move buttons to update its position in the list.

Storing Log Files
When you access a webpage hosted by the server, you should see Author being logged, along with the other logging fields that you selected in the previous section, in the log files that are created. By default, log files for the server and all websites are stored in %SystemDrive%inetpublogsAdvancedLogs.
You can change this “global” log directory for the server and for websites and you can also specify a unique log directory for each website on your server.
This section contains the following procedures:
• To specify a global log directory for the server and websites
• To specify a log directory for a website
To specify a global log directory for the server and websites
1. In IIS Manager, open the Advanced Logging feature at the server level.
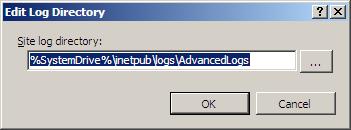
2. In the Actions pane, click Edit Log Directory.

3. In the Edit Log Directory dialog box, update the log directory path information.

• Server log directory. Specifies the log file directory for the server.
• Default site log directory. Specifies the default log file directory for all websites on the server. To change the log file directory for a specific website, see the following procedure.
To specify a log directory for a website
1. In IIS Manager, open the Advanced Logging feature at the website level for which you want to change the log file directory.
2. In the Actions pane, click Edit Log Directory.

3. In the Edit Log Directory dialog box, update the log directory path information for the website.
• Site log directory. Specifies the log file directory for the website.
Regards,
Visit site: http://www.sqlblogging.com
Send an Email: sqlblogging@outlook.com
